How to Install HP Printer driver windows 10


To install HP printer drivers Windows 10 computer, you can follow these steps:

1. You need to download the latest driver for the printer from the manufacturer’s website.

2. Select the appropriate driver for your operating system and then save it to a folder on your hard drive. For example, if you have Windows 10 64-bit, select 64-bit drivers and save it in a folder called "HP Printer Offline."

3. Open Device Manager by clicking on Start and typing "Device Manager" in the search box or by right-clicking on My Computer icon and selecting "Manage." If you are prompted for an administrator password or confirmation, type the password or provide confirmation. 

4. In Device Manager, expand Print Servers > Universal Serial Bus Controllers > USB Printing Support > Generic USB Printer > Right-click on Generic USB.

Fix canon printer not printing error

This type of printhead is incorrect in Windows 10 Fix Canon printer not printing Error. Users are facing errors, This type of print head is wrong. It is common among Canon users and easy to solve. Error in printhead is incorrect. It happens in two situations. First, when you have installed the printhead but it is not working correctly. An incorrect installation of the printhead. Second, when you have not installed a print head in the printer. Put together solutions for both cases.


How do I fix the error on my canon printer


  • Open the printer cover to access the printer cartridge and print head. The cartridge goes up automatically when you open the lid.

  • Before continuing, cut off the power supply to the printer. Now make sure the lever to the right of the cartridge holder is up.Otherwise, it will move if you touch it.

  • Remove all the ink cartridges from the slots. Removing the ink cartridges will expose the black print head.

  • Now remove the printhead gently from the printer. To remove the printhead, hold it by the cartridge slots and gently pull it up, it will pop out.

  • Perform a basic cleaning of the printhead after removing it from the printer.

  • Reinsert printhead and ink cartridges, check that everything is in place as it was before.

  • Close the lid and turn it on after plugging it in.


Therefore, connect printer to wifi after the process is complete and print a page to check whether the error is resolved or not.


Steps to fix Canon printer Error 


  • Switch power off and unplug the printer from the power source.

  • Open the printer cover. If the ink cartridge slots and ink heads are empty, they will be in the middle front.

  • First PC install the printhead into the slot, make sure it fits properly.

  • Install all the ink cartridges one by one, close the lever, and make sure everything is closed securely and there are no empty slots.

  • Close the cover, and then turn on the printer after connecting it to the power source.

  • Now, connect to your computer and try to print a page.


What to do When canon printer shows error code


Either canon printer error can be fixed. Modern printers that have a document scanner on top have no cover and have a different setup. The top methods don't work. If you have that type of printer, follow this method.


  • Power on the printer.

  • Hold the paper output tray and carefully pull it out.

  • Open the main cover of the document scanner, make sure not to touch any buttons.

  • Open the ink cover and wait until the print head stops moving.

  • Remove all the ink tanks one-by-one by pressing the lever and then lifting them.


  • Press Stop until the print head stops moving.

  • Remove the inner cover placed under the ink tanks and push it down.

  • Pull out the carriage tray, you will find it a bit stiff, but it will slide down if you apply a little force.

  • The print head will protrude slightly with the carriage tray, hold the center tab between your index and middle fingers. Pull gently so it comes out of the printer easily.

  • To reinsert the printhead, hold it upright over the cartridge tray and gently push it in. The green circuit board will be in front of you if you're doing it right.

  • After correctly positioning the printhead, push the tray in.

  • Close the inner cover.

  • Insert all inks into their respective slots.

  • Close the ink cover and the main cover.


Try printing a piece of paper to check that the printer is working properly.


Connect HP Printer to WIFI

If we have a printer with a wireless connection we can perform the installation through the two ways we detail below.


Install HP WiFi printer with USB cable


The simplest way for most, and especially if it is the first time you deal with a wireless printer, is to perform this process through the USB cable. It would only be required for installation, and then, you can remove it and start printing through WiFi.


The process would be exactly the same as what we have explained in the previous point.


Configure HP WiFi printer Wirelessly


To connect HP printer to WiFi, the first step will be to connect the printer to the network as follows:


Printers with buttons panel


  1. Press the WIFI button until the light flashes.

  2. Then, in the router, we press the "WPS" button until the light is flashing.

  3. Just look for a few minutes until the printer connects to the wireless network.


Printers with LCD or text screen.


  1. Search the option of «Network or wireless settings»:

  2. Select «Protected Wifi Configuration», then "Press Button» and finally, «Start».

  3. Go to ROOTER and press long-press the "WPS" button until the light flashes.

  4. After this, we must wait until the printer connects to the WiFi network, this process may take a few minutes.


Once the printer has been connected to the network, we can start with the installation.


The first time we turn on the printer, the "Settings" mode is activated for two hours, which will make the wizard, once we install it on our PC, or mobile device, detect the printer and automatically request permission to perform the HadWare installation And the drivers of our HP.


Therefore, the next step will be to download the HP Assistant on the "HP Configuration" website and do the following:


  • We installed the "HP SMART" assistant and opened it.

  • We click on "Add Printer" and then "Configure a new printer".

  • Now on our PC, Smartphone or Tablet, we will go to the available WiFi networks list and select the network that appears with the name "HP-Setup" followed by the model of your printer.

  • Once the installation of the HP WiFi printer is finished, return with your PC or mobile device to the WiFi networking list, and connect it back to the original network.


The "HP SMART" assistant does not find my team.


The HP Smart Wizard works for all equipment. You can install the HP Deskjet 2630 printer, Deskjet 3639, Deskjet 3050, Deskjet 2540, Deskjet 2720, HP OfficeJet 3833, HP Envy 5010, HP LaserJet P1102W, HP Deskjet 3760, HP LaserJet P1102, HP LaserJet P1102W, OfficeJet 3830, HP Photosmart C3180 , HP Envy 4500, HP Deskjet 2722 and all existing HP printer models.


However, if at the time of installation in which the available printers are displayed, our model does not appear, we can do two checks:


  • On the one hand, verify, as we have explained above, that automatic updates are activated.

  • On the other, check that we have enabled the discovery of networks on the team. To do this, we will go to the "Control Panel" and we will select "Center for shared resources and resources". So, we click on "Change advanced sharing settings". At this point, we check that the "Activate network detection" and "automatic configuration" option is ticked. Otherwise, our computer would not be visible to other equipment, such as the printer.


Final checks


After completing the installation, we will make a print and a scanner to check that everything works correctly. In case of an anomaly, we will seek possible causes in the "Help" option of the HP program installed on our computer.


If even so, continue with doubts, you can send us your query and we will assist you.


How to install Canon Printer on Windows 10

 Method 1 – This is the first method you can try to resolve the issue. Follow exactly and in the same way everything that is mentioned below:


  • The first is to make sure that you connect the Canon printer file to Windows 10 and you also need to make sure that it works completely fine.

  • The second step is to install the driver on Windows. You can do this by visiting Canon's official website, searching for the driver, and following the instructions to download it.

  • Once finished, go to the Get Started screen and select the Devices and Printers option.

  • Right-click on the printer mouse and choose the properties option.

  • Once done, find your printer name and its make and model number.

  • go to the menu and select computer

  • choose manage

  • Click the Device and manager option > other devices.

  • Right-click on the model number and choose the Update driver software option. This will be op[en a new window on the screen.

  • Hit the option Browse my computer for driver software.

  • Now select Let me pick Canon drivers on my PC

  • Choose the printer's driver from the drop-down list. Click Next

  • Follow the instructions coming on your screen and click Next

  • Finish the setup

  • Once done Restart the Computer/Device/laptop and do a print test.

  • Start the device and visit Start > Devices and Printers > Printers Properties.

  • Run the print test by Clicking on the option Print test page.

Method 2: You can try this method to download the Canon printer drives in windows 10:


  • The first step is to open the web browser and type Canon Printer followed by the model number in the search engine.

  • A direct link to download the drivers will be displayed.

  • The third step is to directly click on the link to download it.

  • Choose the Operating system.

  • Click on the download option to download the driver.

  • Follow the instructions coming on your screen to download the software.


These were the following steps that you can follow to install Canon Printer on windows 10.


Contact to Avail Real-Time Assistance Related to Canon Printer Issues

We hope that this blog was useful and that you get what you were looking for. We have listed the methods by which one can install the printer drivers on the computer/laptop/PC. All the above-mentioned steps are reliable and by following these steps one can easily install the Canon Printer driver in Windows 10. 

Fix Canon MX920 offline error U052

ERROR U052, as you can imagine, before gutting the machine, I ask the one who knows the most: Google, and carefully observe that this fantastic error is an endemic evil of this and fix canon MX920 offline brand printers with similar characteristics.

Summarizing so that you don't get overwhelmed, from one moment to the next, the printer says that the head is not correct, it invites us to pay almost 100 euros for the piece itself and maybe that way the printer will work again, but I have read several people that even changing the head the error did not disappear.

Before giving the sad news to the user, I disassemble the head, you can see it above with P/N QY6-0700 and which you can find it on Amazon for example. You can see a simple plastic piece with a printed circuit on the back, similar to HP ink cartridges, which are easily removed for replacement.

After collecting the necessary information, I tell the user about the solutions:

  1. Leave the printer like this, as an ornament taking up space on the table
  2. Pay €100 for a piece that is not worth €10 and pray that the message disappears… or not.
  3. Throw the printer in the ass and print on another one 5 meters away and never send or receive faxes again.
I think they will opt for option 3, because of the user's superior emphasis after receiving the news of the death of their underutilized printer.

Turn Canon printers offline to online?

Canon manufactures a wide range of printers, servers etc. Canon printers are very reliable and offer easy and handy printing solutions. Sometimes your printer may show the status to be offline. There are many ways to bring it online. They are:-


  1. Change of settings- go to settings  and then printers. Right click and select use printer online. There should be no printing in queue. If yes, then first clear them. Then go to printer menu and click on cancel all documents. The prints in queue may have caused the above error which also sometimes shows the printer offline. To check if this error is removed, print a test page. Check the network and wireless connections of your printer. Also restart your computer as sometimes this simple step proves to be fruitful.
  2. Reinstall the drivers- open settings and printers and click on printer. Right click and choose properties. Under the menu, general or details, select the driver button. Click on drivers to reinstall it. You can now download the latest version of drivers that suits your Operating System. Now comes re- installation. Go to settings and then printers. Select the printer. Remove the printer from there and reinstall again from add printers.
  3. Another simple method—press start and choose devices and printers. You can also type printers to open settings. Right click on your printer’s icon. You will find your device’s name. click on see what’s printing. Now select manage device. Now, in your open window, click printer and unselect use printer offline. The items in the print queue can now be printed.

Canon printer offline windows 7

Windows OS 7 printer often faces this common problem of turn canon printer offline to online. This usually happens due to the communication error between the printer and the PC or computer. It may be due to common problem like a paper jam or a loose cable or it can be a problem with the printer drivers or the software. This error can occur due to various factors. Like-
  • Driver errors
  • Internal printer failures
  • Errors in the operating system
  • USB connection failures
  • Paper jams etc.
These errors can be easily fixed by the steps given below :-
  1. Primary steps – the printer should be switched OFF and ON once before going to the further steps. then wait for sometime. in case it still doesn’t respond then make sure that the USB cable is properly attached at both the ends. If the printer is wireless, then the Ethernet cable should be kept in check.
  2. Setting the printer manually – press start button on the bottom left of the screen. Click control panel and then printers and devices. click on the printer and go to see what’s printing. A window will open, then choose printer from the top bar. Click use printer online from the menu.
  3. Removing print queues – press right click from the see what’s printing menu and click cancel if you see any prints in pending. When this is removed, select use printer online again.
  4. Removing and re-installation – press right click on the printer from the devices and printers and click on remove device. Now click on printer again and select add printer option from devices and printers.
  5. Removing the drivers and packages – always check that you are use the windows or sign-in as an administrator. Open command prompt and type print to open the print server properties. Remove the driver and package for the printer. Then you can add the printer by selecting add a printer from devices and printers.

Canon printer online but not printing

If you are unable to print on your printer or have some printing issues, you need to remove the issues for the proper functioning of the printer. The issues you are facing can be –
  • Printing black ink problem
  • Printer roller issue
  • Printer not communicating with the device
  • Printing wrong colors
  • Printer password problem
  • Blank page problem
To solve the above problems, try fixing it with the steps below :-
  1. The most common problem is the paper jamming problem. It happens with the wrong paper type or due to the faulty printer rollers.
  2. The other problem can be the printer not working. it generally happens due to the toner in the printer. To resolve this problem, just go to settings and change the toner settings of your printer.
  3. The other problem that may arise can be the toner ink not staying on the paper. For this, try to replace the fuser assembly of the printer.
  4. Sometimes, the issue can be the electrical supply. For this, the printer should be properly plugged in the power socket. Try to avoid any extensions in case you are using any.
  5. Usually the printer stops printing from the right tray. To stop this problem, check the printer properties and the connection of your printer and computer.
  6. The printer drivers also often create issues. the printer drivers should be installed properly to make the printer work efficiently.
  7. You should also check your ink cartridges. If they are faulty, color coordination would be wrong or no colors would be shown. For this, one needs to check or change the cartridges. The faulty parts of your printer affects the quality and efficiency of your printer.
Related Article :- 

Canon printer offline to online windows 10

Windows OS 10 printer has this general problem of showing the printer offline. You can often see a message, “printer offline” on your screen. With these simple and easy steps you can easily bring your printer online :-
  1. Physical check- the USB should be properly connected on both the sides. If the printer is connected to a network, check the Ethernet cable and if you have a wireless printer, then check the internet connection. Also, try to connect from a different cable, if you feel that the problem is in the cable. If you want to check your network, connect it with a cable to check that the network is working fine.
  2. Manual settings-press the start on the bottom left of the screen. Then choose devices and printers from the  control panel. Right click on printer and choose see what’s printing. Then open printer from the top menu bar. Then click use printer online.
  3. Prints in queue- again go to see what’s printing menu, right click and press cancel if you see any print jobs in queue.
  4. Re-installation of printer- press right click from devices and printers and choose remove devices. then add your printer by clicking on add a printer from devices and printers.
  5. Printer drivers and packages- you should always sign-in as administrator while using windows. Go to command prompt and type print. This will open the print server properties window. Then remove  drivers and packages for printer in question. Go to add printer again clicking on it from devices and packages.  Now your printer should show online and you can continue to print.

HP Officejet 7110 - Cartridge and Offline Problem

Are you facing an issue with your Hp printer offline regarding cartridges? The ink cartridge of your printer identified in the message is missing, damaged, incompatible, or inserted into the wrong slot in the printer. Don’t worry we are here to help you. Read the easy and simple steps to solve hp Officejet 7110 cartridges problems.

To resolve this issue, try the following solutions. Solutions are listed in order, with the most likely solution listed first. If the first solution does not solve the problem, continue with the others until you solve the problem.


Solution 1: Turn the printer off and on again.

Solution 2: Install the ink cartridges correctly.

Solution 3: Replace the ink cartridge.

Solution 1: Turn the printer off and on again

  1. Turn the printer off and then back on.
  2. If the issue is not resolved, try the next solution.
Solution 2: Install the ink cartridges correctly
Make sure all ink cartridges are installed correctly:
  1. Carefully open the ink cartridge access door.
  2. Remove the ink cartridge by pushing it to release it and then pulling it firmly toward you
  3. Insert the cartridge into the slot. Press down firmly to make sure it makes contact.
  4. Close the ink cartridge access door and check if the error message has disappeared.
To check if the printer is paused or offline, follow these easy and simple steps:

1. Depending on your operating system, do one of the following:
Follow these steps for Windows Vista: On the Windows taskbar, click Start, click Control Panel, and then click Printers.

Follow these steps for Windows XP: On the Windows taskbar, click Start, click Control Panel, and then click Printers and Faxes.

2. Double-click the product icon to open the print queue
3. In the Printer menu, make sure there are no marks next to Pause Printing or Use Printer Offline.
4. If you have made changes, try printing again.

Hopefully, this will resolve the HP Officejet 7110 cartridge and offline problem. Leave your comments in the comment box below.

How to connect a canon printer to wifi

Canon printers stand out for their excellent print quality for texts and photographs, as well as the performance and elegance of their equipment.

Today, the big and small brands of printers in the world produce equipment with all kinds of wireless technologies (Wireless Connection). To make it easier for users to know your products. The renowned Canon brand offers wireless printers in all its models.

Steps to follow

We'll start by saying that you don't need to be an expert to be able to Connect Canon printer to Wifi ; It is extremely simple and there are different ways to connect:


Standard connection method for Windows users

You just need an installation CD, and if you don't have one, you can download the driver or driver directly from the Canon website. Follow the instructions to configure your printer for a wireless LAN connection. using a wireless router. This way you can connect multiple devices.

Standard connection method for Mac users

Download installation software directly from Canon's website depending on your printer model and follow the installation wizard's instructions. Once done, you can configure your printer. with a LAN connection through a wireless router.

WPS connection method

This is the simplest method and allows you to connect your printer to an access point, also known as a router or hub (router); no password is required.
However, you must meet certain conditions for your job. First, the access point must have a physical auto-connect button called WPS (Wi-Fi Secure Setup).

And furthermore, your network must use WPA (Wi-Fi Protected Access) or WPA2 Security Protocol; but this is not a problem, most routers with WPS use this protocol.

Connect Wi-Fi printer to Canon mg3650

  1. Place the printer near the router and connect it properly to a power source. Make sure it's on.
  2. Do press and hold the wifi button until the blue indicator on the button flashes.
  3. Click black copy button and then the Wi-Fi button Again, the blue indicator of the Wi-Fi button will blink rapidly.
  4. On the router, press and hold the WPS button above.
  5. Green (power) and blue (Wi-Fi) lights on the printer will blink together to indicate that they are establishing a connection with an access point.
  6. When the printer establishes a successful wireless connection, the Power light and the Wi-Fi light remain on.
  7. Make sure both lights are on and on continuously throughout the process.
To confirm the network settings and that the printer is correctly connected to the wireless network, just print the network settings.
  1. Turn on the printer.
  2. Insert two sheets of A4 or Letter size paper.
  3. Press and hold the Wi-Fi button on the printer until the power button blinks green once.
  4. Press the Wi-Fi button again and the text with the network information will be printed.
  5. Make sure in the text that the connection is active and that the service set identifier (SSID) or the name of the wireless network is the same as the name of your network.
NOTE - Read this also

Printer offline in Windows 10

Printers are certainly not a new technology, so you would think they wouldn't have problems anymore. Unfortunately, this is not the case. The problem you may face when your printer tells you it is HP printer offline in Windows 10.

Any good modern printer can connect to your computer via Ethernet or Wi-Fi.


Clear the print queue

A clogged print queue can be the cause of many problems, including the printer jam error in windows 10.
To clear the print queue, press Windows key + I to open Settings, go to Devices> Printers & Scanners, select your printer, and click Open Queue.
On the top toolbar, go to Printer> Cancel All Documents.

Restart the spooler service

The print queue is a service that manages the interaction with the printer.
Open the Start menu, search for services and open a similar application. Scroll down until Spool Printing appears in the Name column. Right-click and click Restart.

Update the printer drivers

It is sometimes necessary to find and replace outdated drivers, and an offline printer is one such situation where updating drivers can help.
To do this, press Windows Key + X and select Device Manager. Double-click the Printers category. Right-click the printer and click Update Driver.
If no updates are found, double-check the printer manufacturer's website (be it HP, Canon, Brother, or whatever).

Use the printer software

Some printer manufacturers have software to help you manage and troubleshoot the printer. In this case, you need to install the software (the printer may have a software CD, otherwise find it on its website).
Press Windows key + I to open Settings. Click on Devices> Printers & Scanners, select the printer, and click Manage. Click on Open Printer Application if the software is installed.
Open the software and check if any sections allow you to restart, troubleshoot, or repair the printer.

Remove and reinstall the printer

If all else fails, you can remove the printer from your computer and then add it again.
To do this, press Windows key + I to open Settings. Go to Devices> Printers and scanners. Select your printer, click Remove Device, then click Yes.
Then click Add Printer or Scanner. Follow the wizard to reconnect the printer to the computer.


How to change status "offline" to "online" in a printer from the PC WINDOWS or MAC

Although printers are not used as much as they used to be, you need to know how to install a Virtual PDF printer. Still many people still need this device every day for many reasons. Printers are great for a host of activities whether it's work or study-related.

The problem comes when we suddenly find that our printer went from being online to offline. That is when we must learn how to change my printer offline to online, which is what we are going to see in this article.


Change printer from offline to online in windows

The first thing we must do is open the start menu that is located at the bottom of Windows on the left. After this, we will go to the "Printers and Scanners" icon. You can also access this option from the "Control Panel" by typing the aforementioned after pressing start.

Now you will be able to see a list of available printers. You will simply have to double click on the icon of the printer that you want to change to online. A pop-up window should open where you will have all the details that interest us.

If you look at this window you will find an option that says something similar to this "Use printer without connection" marking this option means that you will have the printer offline. In case you want it online, simply uncheck the mentioned option. Something that you should know and that you will surely find very useful is that you can learn how to print from your mobile on an Epson, HP, or Canon printer.

How to activate an offline printer still connected

Nowadays one of the things that many people do not use as much is printers, this is because many documents are usually reviewed and signed digitally. However, many printers are still used in the study or for leisure activities.

However, the use of a printer sometimes has a slight number of problems, problems that occur courtesy of a lack of maintenance or failing that, a software failure. In Windows and Mac, it is common for the printer to fail even when connected.

Related - 

This is marked as that the printer is offline, it is as easy to solve as 

In this way, the printer goes from offline to online quickly, thus allowing it to continue with other activities. The use of a printer is something very common for millions, but problems often arise that end up making users uncomfortable.

For this type of problem, the options of printers and devices are something elementary, this is how users usually solve their problems without the help of an expensive technical service or technical assumption. You just need to know how to turn on a printer that is offline on Windows or Mac, simply by following a few very simple steps.

As always remember that any kind of doubt you have regarding this you can leave it in the comment box that you will find a little further down.

How to connect a WiFi printer to Windows


We are going to explain how to connect a WiFi printer to Windows 10 so that you can use it from a computer on the same network without the need for cables. In general, you will have the printer connected to a computer using a USB cable, but with this procedure, you can also use it from other computers or laptops without having to physically connect it to them.

This will help you in some cases, such as when you have more than one computer at home and you don't want to move the printer from one place to another. It can also help you in offices where all computers are connect printer to WiFi, which must also be the one used by the printer.


But before you start, you should keep in mind that not all printers allow you to do this. You will have to have bought a printer that has WiFi technology to connect through the network, something that should be indicated on its box.


Connect your printer

The first thing you have to do is have the printer connected to the WiFi network of the computer from which you will send documents, a process that varies depending on the model and manufacturer. Some may have a control screen, but others require connecting to a computer and running an installation application. Here you have links to the processes of Brother, HP, and Epson, three of the main manufacturers, you can also try to connect it by WPS, but you should look at your manual.


Now, connect the computer that you want to connect to that printer to the same WiFi network in which it is already configured. When you do, open the Windows settings by clicking on the gear icon from the Start menu or the notification panel, and enter the Devices category that will appear second.


Once inside the Devices options, in the left column click on the Printers and scanners section. Once in it, click on the Add a printer or scanner button that will appear first, and that has the plus symbol.


Windows 10 will automatically detect and install the printer it finds on the same WiFi network, and it will automatically be added to the Printers and Scanners list. In some cases, it may first show it to you so you can click on it to proceed with the installation. That's how easy everything should be.


Related : -


If you can't find it, it may be because the printer has a pairing button. If so, press and hold it for a few seconds until it blinks, or look at the manual to see how it works. When pairing mode is activated, look for it again in Windows as we have taught you. You should also make sure that the printer is turned on and correctly connected to the same WiFi.


If the printer does not appear, you can click on a button that will appear called The printer I want is not on the list. This will open a window for you to search for the printer manually using its name or a TCP / IP address. In this window, the first option will be to search for old printers, and you will also have options to search for them by Bluetooth with a manual step-by-step configuration.

How to connect an Epson printer by WiFi?


Nowadays, practically all new models of Epson printers incorporate WiFi connections. However, it happens that many people do not have enough information to know how to connect an Epson printer via WiFi and end up wasting this excellent alternative for use.

Next, we will give you a step-by-step on how to make this connection. But first, we mention some recommendations that will make the performance of your printer much more effective.


First of all! download manufacturer's programs


Install the manufacturer's programs on your computer! We know that normally these programs are not used for anything other than taking up space on the pc. However, they have many functions that facilitate and optimize the performance of your printer. Including some related to "how to connect Epson WiFi printer".


Now that you have the advantageous support programs on your computer, we can start with the step by step to Connect Epson Printer to WiFi.


Step 1: Configure the Connection type WT


The first step to connect your Epson printer to WiFi begins with the support program that you will have downloaded to your computer. Once you access it and begin the installation process, you must follow the instructions indicated by the program as you progress through the process.


After the program ends with the "Installation" stage, which lasts about 8 or 10 minutes, you will go to the "Configuration" stage. Once in it, the first window that the program launches will allow you to "Select the type of Connection", for which you will choose the option of "Wireless Connection" and click on "Next".


The next window will allow you to choose between two options: "I am going to configure the printer for the first time" or "The printer is already on my wireless network". In your case, you are doing the process for the first time, you will choose the first option and then you will click on "Next".


In case your computer automatically detects the WiFi network that you want to connect, the program throws up an “Automatic WiFi Connection” window. In it, you will select the option “Yes” and then you will click on “Next”.


Automatic Connection is viable when we are at home connected to a single home network. However, if you are in a workplace, it is very likely that there is more than one WiFi network, so you will need to continue with Step 2.1 or 2.2.


Step 2.1: Access the WiFi Network from the Printer Control Panel


In case the computer does not detect the WiFi network automatically, you will find a window to Select the Configuration Method, where you will choose the option "Use the printer buttons" and then you will click on "Next".


At this point, you will need to go to the control panel of your printer and follow the following path: Menu >> Configuration >> Network Configuration >> WiFi Configuration >> Setup Assistant. WiFi >> Select the SSID (WiFi Network) of your preference >> Enter the password.


If the process is effective, the printer will give you a message if you want to print a test report (Select the "No" option). Once you get this message, go to your computer and click "Next" until you get a window in which you can indicate that "The printer is already connected to your network."


After this step, the program will verify that the Printer-WiFi-Computer connection is effective and you will be able to print a test sheet. At this point, the process will have effectively ended.


Step 2.2: Connect via temporary USB cable

This option corresponds to the alternative of “Connect a USB cable temporarily”, instead of the one already explained, “Use the printer button”. Once you click on "Next", you must follow the instructions of the program, until you find a window that indicates that you must make the cable connection.


Once you do, continue the brief instructions of the program until you can disconnect the cable, select your WiFi network and enter the respective password.


Completing this process is the same as in Step 2.1, resulting in a successful connection. With it, you can print files from any device, as long as they are on the same WiFi network.

What To Do When Your HP Printer Is Offline


It's a weekly day and you need to print a file for an important meeting in 30 minutes. Open the file and click the Print button and wait for the printer to run. Nothing. Then a message appears in the lower right corner of your computer desktop, saying that the printer is offline.

Then check the printer status in the Devices and Printers window and see this:


Well, you're not the only one facing this problem. But don't worry, it's not a difficult problem to solve. You can easily fix it by following the methods below.


Here are 5 solutions to try. You may not need to try them all; just scroll down until you find it works for you.


  • Check the printer connection

  • Update the printer driver

  • Check the print status

  • Restart the Print Spooler service

  • Add a second printer

Before you begin, make sure that there is nothing wrong with your printer. If the problem is with your printer, you need to ask the printer manufacturer for help.

Method 1: Check the printer connection

HP Printer offline is a way for your printer to tell you that something is wrong with the communication between your computer and the printer, via USB cable or network connection (wireless and wired). So one of the first things you check is the connection of your printer to your computer.

1) Turn off and then on the printer to restart it. Wait a while for it to be completely ready.


2) Check the printer connection:


2.1) If your printer is connected with a USB cable: Make sure the printer cable is securely connected. Then be sure to connect the cable to the computer via a working USB port.


2.2) If your printer is connected to the Wired Network: Make sure the printer cable is securely connected to the Ethernet port. Then make sure that the port to which the printer is connected to the router works properly. Check that the network signal on your printer is blinking.


Note: Your printer may disconnect if the connection cable is loose, too old, or broken, you may need to replace it if necessary.


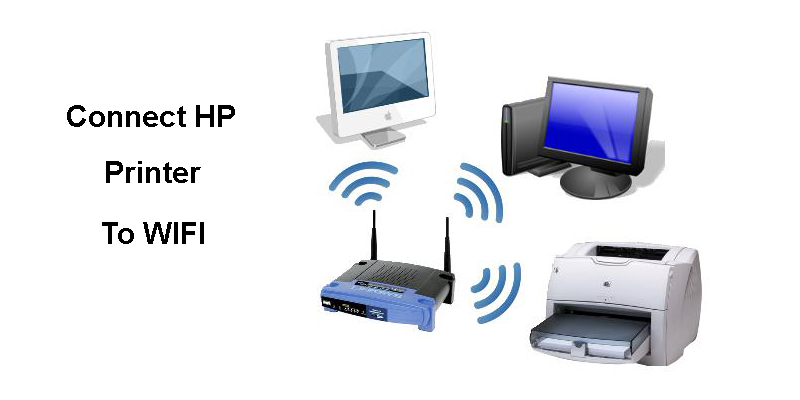
2.3) If connect printer to wifi network: Check the printer and make sure it is connected to the computer network. The illuminated wireless icon on your printer usually indicates that you are connected.


Make sure you can print now. If the problem persists, continue with the next method.

Method 2: Update the printer driver

The problem may be caused by faulty printer drivers. So you can update the printer driver and see if it works.


There are two ways to get the right drivers for your printer: manually or automatically.


Manually update the driver - You can manually update the printer driver by accessing the manufacturer's website and searching for the latest correct driver. Make sure you only choose the driver that is compatible with your version of Windows 10.


Automatically update the driver - If you don't have the time, patience, or computer skills to manually update your printer driver, you can do it automatically with Easy Driver. Driver Easy will automatically recognize your system and find the correct driver for your exact printer and your version of Windows 10, download and install it correctly:


1) Download and install Driver Easy.


2) Run Driver Easy and click the Scan Now button.


3) Click the Update button next to the marked printer to automatically download the correct version of this driver, and then install it manually (you can do this with the FREE version).


Or click Update All to automatically download and install the correct version of all drivers that are missing or out of date in your system (this requires Pro Version - you will be prompted to upgrade when you click Update on all ).


4) After updating the printer driver, make sure the offline issue is resolved.


Method 3: Check the print status

The automatically updated printer driver provided by Windows Update may change the printer settings without notifying you. So you need to make sure that the status of your printer is smooth:


1) Turn off the printer, and then turn it on again.


2) On the keyboard, press the Windows logo key and I at the same time. Click Devices.


3) Click Devices and Printers.


4) Right-click the green checkmark icon and click View Print.


If what you see here is a gray icon without a green checkmark, right-click the icon and click Set as Default Printer.


Then right-click it and click View Print.


5) Click Printer. If you see a checkmark next to Stop printing and Use an offline printer, click them to remove ticks.


See if you can print now.

Method 4: Restart the Print Spooler service

Your printer will refuse to work if the Print Spooler service does not work properly. In some cases, this service is somehow disabled. You need to check that it is running first, and then decide whether or not to restart it:


1) On the keyboard, press the Windows and R logo keys at the same time. Type services.msc in the search box and press enter.


2) On the keyboard, press the P key to quickly locate the Print Spooler item. See if his status is Running.


3) If you can't see its status here, right-click the Print Spooler service and click Start.


4) If you want, you can restart this service as well: right-click Print Spooler and click Restart.


5) Close the Properties window.


Make sure your printer is online now.

Method 5: Add a second printer

NOTE: This method only works when your printer is networked instead of a USB cable.


If none of the above methods work, you can still set a manual IP address for your printer and add a port on your computer to match.


You must have an IP address for the printer. You can usually find it in the printer manual. If you do not have the manual, try searching for it on the manufacturer's website.


1) On the keyboard, press the Windows logo key and I at the same time. Click Devices.

2) Click Devices and Printers.


3) Right-click the printer and select Printer Properties.


4) Click the Ports tab, and then click Add Port.


5) Select Standard TCP / IP Port, then tap New Port.


6) Click Next →.


7) Type the IP address of the printer. Next Click →.


As mentioned, finding the IP address of your printer differs from printer to printer. If you still have your printer's instructions, go to it and see if you can find your way. If not, go to the manufacturer's support website and get detailed instructions.


Your offline printer should work perfectly.


If you need more assistance with the offline printer issue, feel free to leave us a comment and we'll see what else we can do to help.


How to Install HP Printer driver windows 10

To install HP printer drivers Windows 10 computer, you can follow these steps: 1. You need to download the latest driver for the printer fr...